3. BRASH RobotSim Demo
This page will take you through how to run everything for the RobotSim demo.
It uses a number of ROS2 messages that have been automatically generated from cFS binaries, each with a dedicated topic.
This example provides a demonstration on how a ROS2 ecosystem running as part of a mission Ground System could communicate with a cFS application.
3.1. Start cFS
$ cd ~/code/TL_cFS/build/exe/cpu1
$ ./core-cpu1 2>&1 | tee out.txt
3.2. Start the BRASH groundsystem bridge
$ cd ~/code/brash
$ . install/local_setup.bash
$ ros2 launch cfe_plugin cfe_bridge.launch.py
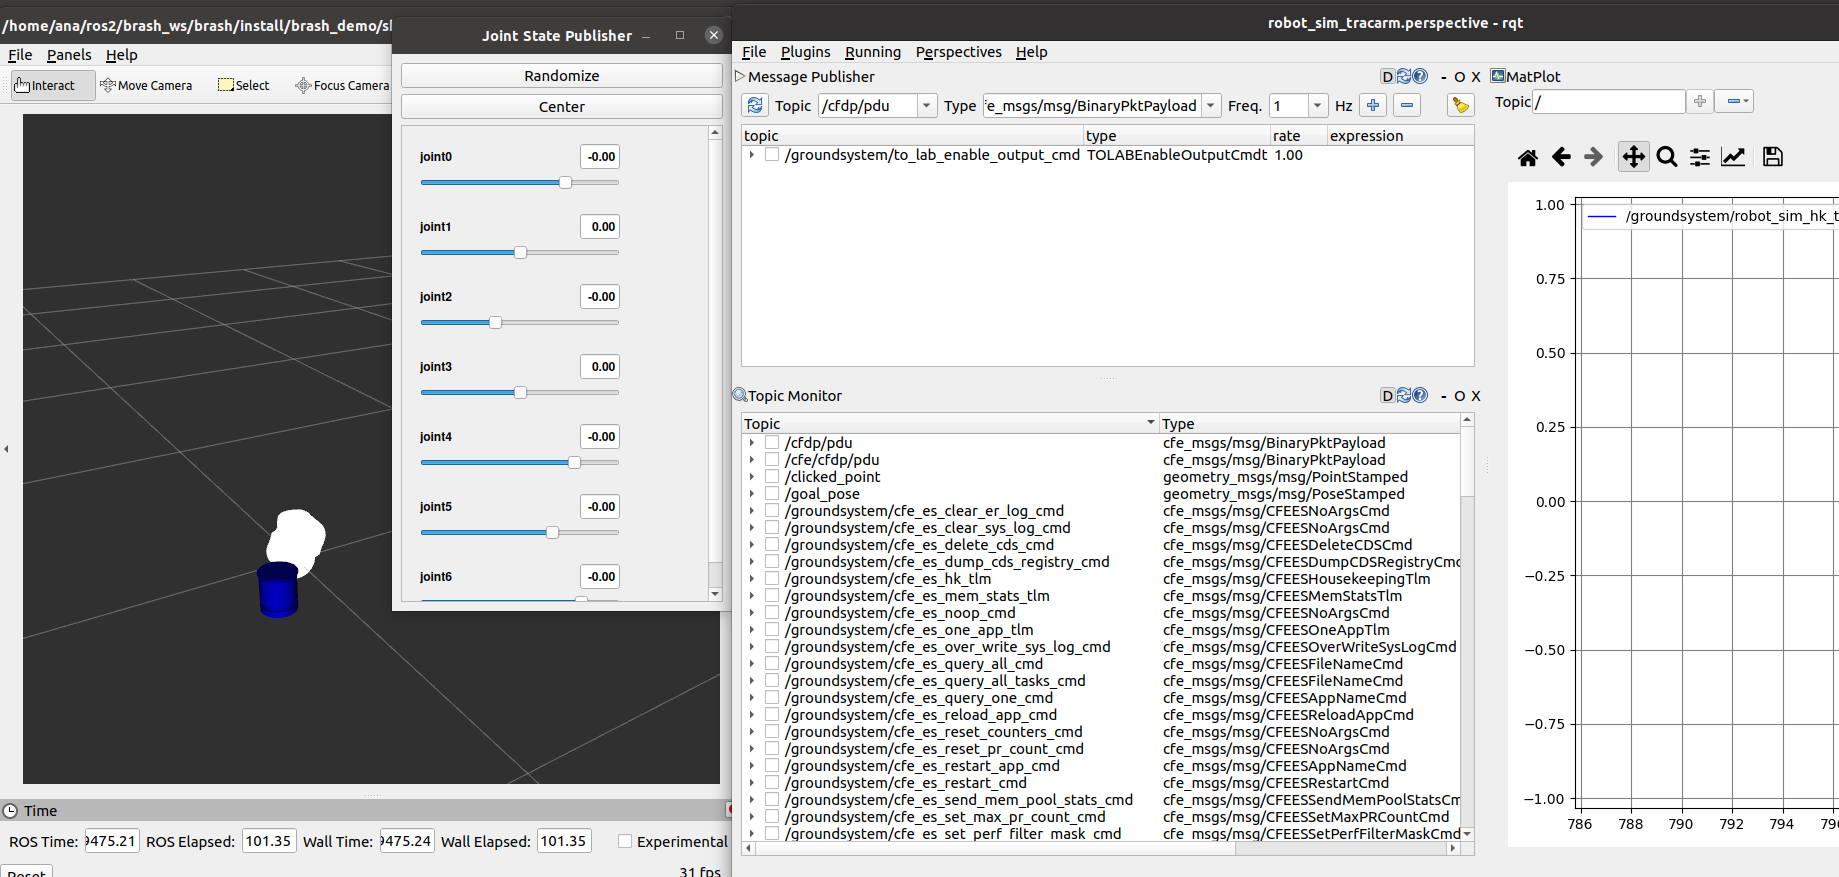
3.3. Start ROS2 nodes in the ground system
Start the ROS2 nodes you need to command and visualize the robot
$ cd ~/code/brash
$ . install/local_setup.bash
$ ros2 launch brash_application_tools robot_sim_tracarm.launch.py
This launch file starts the following nodes:
An rqt node with a default perspective.
A robot_state_publisher node to visualize the tracarm robot.
A joint_state_publisher_gui node, to send commands to the robot.
A joint_state_converter node, which republishes 2 types of ROS2 messsages:
Telemetry messages of type cfe_msgs/RobotSimHkTlmt into sensor_msgs/JointState (from the cfe_plugin to the robot_state_publisher).
Joint command messages of type sensor_msgs/JointState into RobotSimJointCmdt (from the joint_state_publisher_gui to the cfe_plugin).
An Rviz node to see the robot.
You should see these windows pop up:
3.4. Start the BRASH sbn bridge in the flight system
Run the cfe-sbn bridge to see cfe data in ROS2.
$ cd ~/code/brash
$ . install/local_setup.bash
$ ros2 launch cfe_sbn_plugin cfe_sbn_bridge.launch.py
3.5. Setup rqt gui
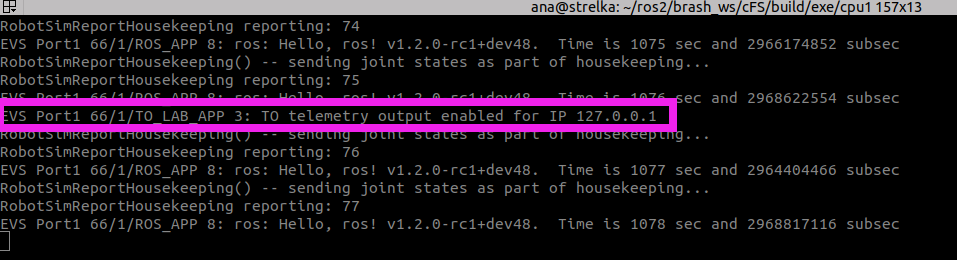
In Message Publisher : Enable the TO output by sending a command message to
/groundsystem/to_lab_enable_output_cmd. Before sending the command, you’ll need to expand thepayloadfield in the UI and set thedest_ipthe approprate IP, probably'127.0.0.1'unless you have changed it inTO_LabandCI_Lab.After this, send the command by right clicking over the topic and selecting Publish Selected Once.

Warning
The step above is fundamental to get the data flowing to the ground! As mentioned in the Groundsystem demo, you’ll know that your request was sent back to cFE if you see this message in the cFE terminal:
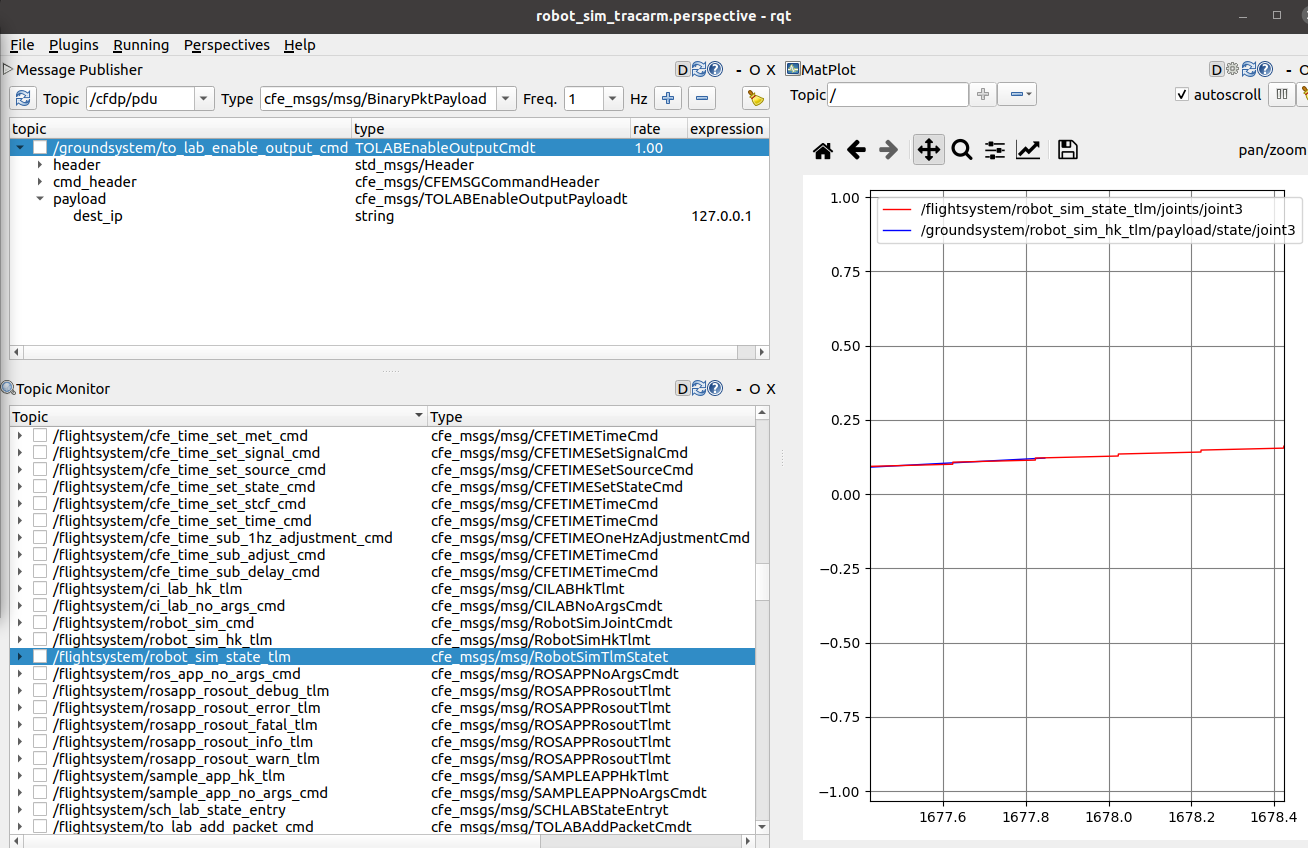
In MatPlot , add these topics if they are not there already:
Add the topic
/groundsystem/robot_sim_hk_tlm/payload/state/joint3Add the topic
/flightsystem/robot_sim_state_tlm/joints/joint3
3.6. Controlling the robot
With everything running, you can use the joint state publisher GUI to set the position of the robot. You will see the robot move to achieve the desired goal in RViz, where the position is updated from the 1Hz TO telemetry message. In the rqt plot window you can see this joint position as updated by the low frequency TO data, and the higher frequency telemtery received by the SBN bridge instance.
Of course in a “realistic” scenario, cFE and the SBN bridge would not be running in the same place as the ground system bridge and rviz tools, but this demonstration gives a flavor of how our BRASH bridge tools can be used in both flight and ground contexts and be used to interact with a robot system in different ways.