9. Running BRASH in a multi-robot setup
The previous tutorials have shown how to run Brash using two setups:
Single-host: Run everything in a single machine.
Multi-host: Simulate running a multi-computer system using Docker in one machine.
In this tutorial, we’ll run the same RoboSim example from tutorials 3 and 6, but now in a more realistic setup with multiple machines.
9.1. Pre-Requisites:
You’ll need 3 machines within the same network:
fsw : Spacecraft machine that will run the cFS process.
rosgsw : Ground machine from which the user will send commands using ROS2 and will receive robot data to visualize in Rviz/RQT
rosfsw : Flight robot machine that runs ROS2 (e.g. a rover, a robot arm).
You’ll need to have installed either cFS or brash on the machines as follows:
fsw : Install cFS (steps here)
rosgsw : Install Brash (steps: here)
rosfsw : Install Brash (steps: here)
Note
If your machines are in the same network, ROS2 by default will make information such as topics visible among machines. To avoid this, set the ROS_DOMAIN_ID environmental variable to different non-zero values in your rosgsw and rosfsw machines (e.g. 20 and 21), such that by default they do not eavesdrop on each other.
9.2. Set up IP addresses:
Start by writing down the IP addresses of your 3 machines. You can use the ifconfig command in your terminal to get this information.
9.2.1. fsw machine
In your fsw machine, go to sample_defs/tables:
$ cd ~/cFS
$ cd sample_defs/tables
And edit cpu2_sbn_conf_tbl.c . Modify the IPs for Self and rosfsw (processors 2 and 3) to be the IPs for your fsw and rosfsw machines. respectively. Leave the ports (2235, and 2236) as they are.
.Peers =
  {
     {/* [0] - Corresponds to cpu1 and not used in typical brash config */
       .ProcessorID  = 1,
       .SpacecraftID = 0x42,
       .NetNum       = 0,
       .ProtocolName = "UDP",
       .Filters      = {"Remap"},
       .Address      = "10.5.0.3:2234",
       .TaskFlags    = SBN_TASK_RECV},
     {/* [1] - Self */
       .ProcessorID  = 2,
       .SpacecraftID = 0x42,
       .NetNum       = 0,
       .ProtocolName = "UDP",
       .Filters      = {"Remap"},
       .Address      = "XXX.XXX.XXX.XXX:2235", // <== WRITE fsw's IP HERE !!!
       .TaskFlags    = SBN_TASK_POLL},
     {/* [2] - rosfsw */
       .ProcessorID  = 3,
       .SpacecraftID = 0x42,
       .NetNum       = 0,
       .ProtocolName = "UDP",
       .Filters      = {"Remap"},
       .Address      = "XXX.XXX.XXX.XXX:2236", // <== WRITE rosfsw's IP HERE!!!
       .TaskFlags    = SBN_TASK_POLL},
  },
.PeerCnt = 3};
Build cFS, so your changes take effect:
$ cd ~/cFS
$ make && make install
9.2.2. rosgsw machine
Open a terminal and go to cfe_plugin in your brash workspace:
cd ~/brash
cd src/cfe_ros2_bridge_plugin/cfe_plugin/config
Open the cfe_config_multihost.yaml file and change the value of udp_command_ip to be the IP of your fsw machine:
cfe_bridge:
  ros__parameters:
    plugin_name: cfe_plugin.cfe_plugin
    namespace: /groundsystem
    plugin_params:
      udp_telemetry_ip: "0.0.0.0"
      udp_command_ip: "XXX.XXX.XXX.XXX" # <== WRITE fsw's IP HERE !!!
      udp_receive_port: 1235
      udp_send_port: 1235       # 1234 for cpu1 (singlehost setup), 1235 for cpu2 (multihost setup)
9.2.3. rosfsw machine
Open a terminal and go to cfe_sbn_plugin in your brash workspace:
cd ~/brash
cd src/cfe_sbn_bridge_plugin/cfe_sbn_plugin/config
Open the cfe_sbn_config_multihost.yaml file and change the value of peer_ip to be the IP of your fsw machine:
cfe_sbn_bridge:
  ros__parameters:
    plugin_name: cfe_sbn_plugin.cfe_sbn_plugin
    namespace: /flightsystem
    plugin_params:
      msg_pkg: cfe_msgs
      udp_receive_port: 2236
      udp_receive_ip: '0.0.0.0'
      spacecraft_id: 66
      processor_id: 3
      epoch_delta: 315532800
      rosout_name_max_length: 32
      rosout_msg_max_length: 128
      rosout_file_max_length: 64
      rosout_function_max_length: 32
      # fsw information
      peer_ip: "XXX.XXX.XXX.XXX"         # <== WRITE fsw's IP HERE !!!
      peer_port: 2235             # 2234 for cpu1, 2235 for cpu2
      peer_processor_id: 2        # Processor id (1 or 2, for cpu1 - singlehost setup, or cpu2 - multihost setup)
You are all set and ready to run!
9.3. Running the RobotSim demo in a distributed setup:
fsw machine : Run cFS. Make sure to use cpu2 :
$ cd ~/cFS/build/exe/cpu2
$ ./core-cpu2 2>&1 | tee out.txt
rosgsw machine : Run the cfe/ROS2 bridge:
$ cd ~/code/brash
$ . install/local_setup.bash
$ ros2 launch cfe_plugin cfe_bridge.launch.py cfe_config:=cfe_config_multihost.yaml
Note that we are using the cfe_config argument to use the yaml file which we edited earlier to have our setup IPs.
rosgsw machine : In another terminal, start the UI tools that will allow us to send commands and visualize data from the flight system:
$ cd ~/code/brash
$ . install/local_setup.bash
$ ros2 launch brash_demo robot_sim_tracarm.launch.py
In order to get telemetry data, we need to send a request. Go to the rqt window, in the Message Publisher plugin, edit the dest_ip parameter for the /groundsystem/to_lab_enable_output_cmd topic and set the value to be the rosgsw IP .
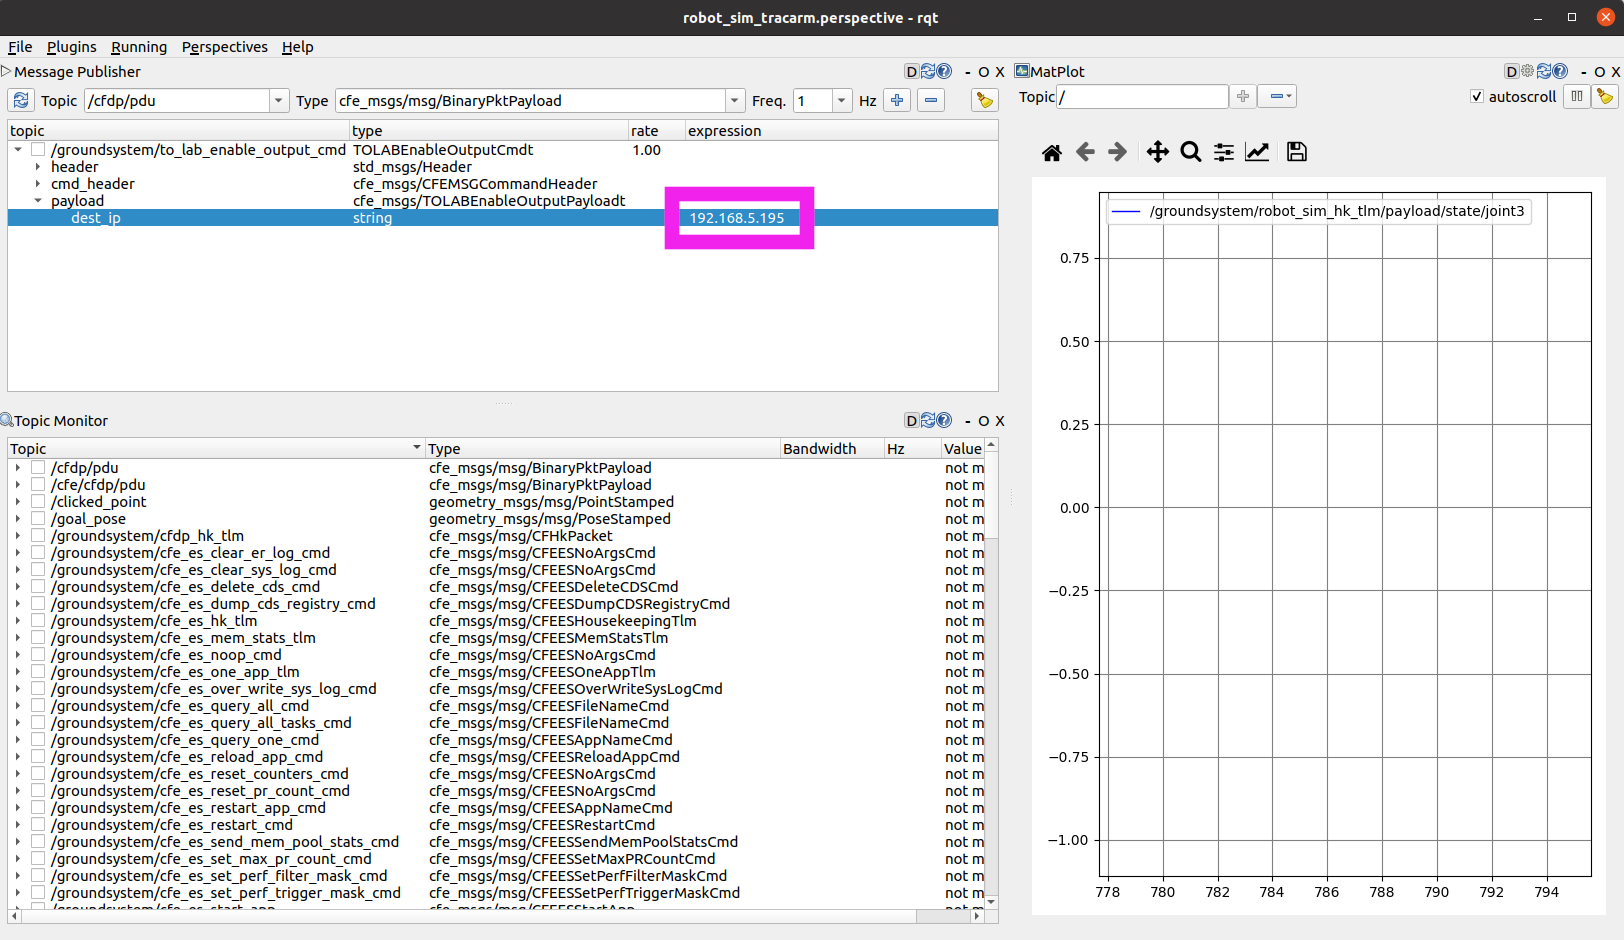
Once you right-click on top of the topic and click Publish once, you should see the robot shown straight up, in a zero pose. If you move the sliders in the joint publisher gui, you’ll see that the robot starts to slowly move in Rviz. The slow motion is due to the fact that the joint states are being calculated in the fsw machine and being returned through the bridge at 1Hz.
rosfsw machine : For this demo, the rosfsw machine is not doing any actual calculation or interacting with an actual robot, so here we’ll just use it to show how ROS2 data can be shown in the flight side using the SBN bridge. Go to the terminal:
$ cd ~/code/brash
$ . install/local_setup.bash
$ ros2 launch cfe_sbn_plugin cfe_sbn_bridge.launch.py cfe_sbn_config:=cfe_sbn_config_multihost.yaml
Note that we are using the yaml file that we edited earlier to have our setup IPs.
That is it! You should now have access to the /flightsystem topics, which are coming from the fsw machine. You could use rqt to visualize this data.